# Text
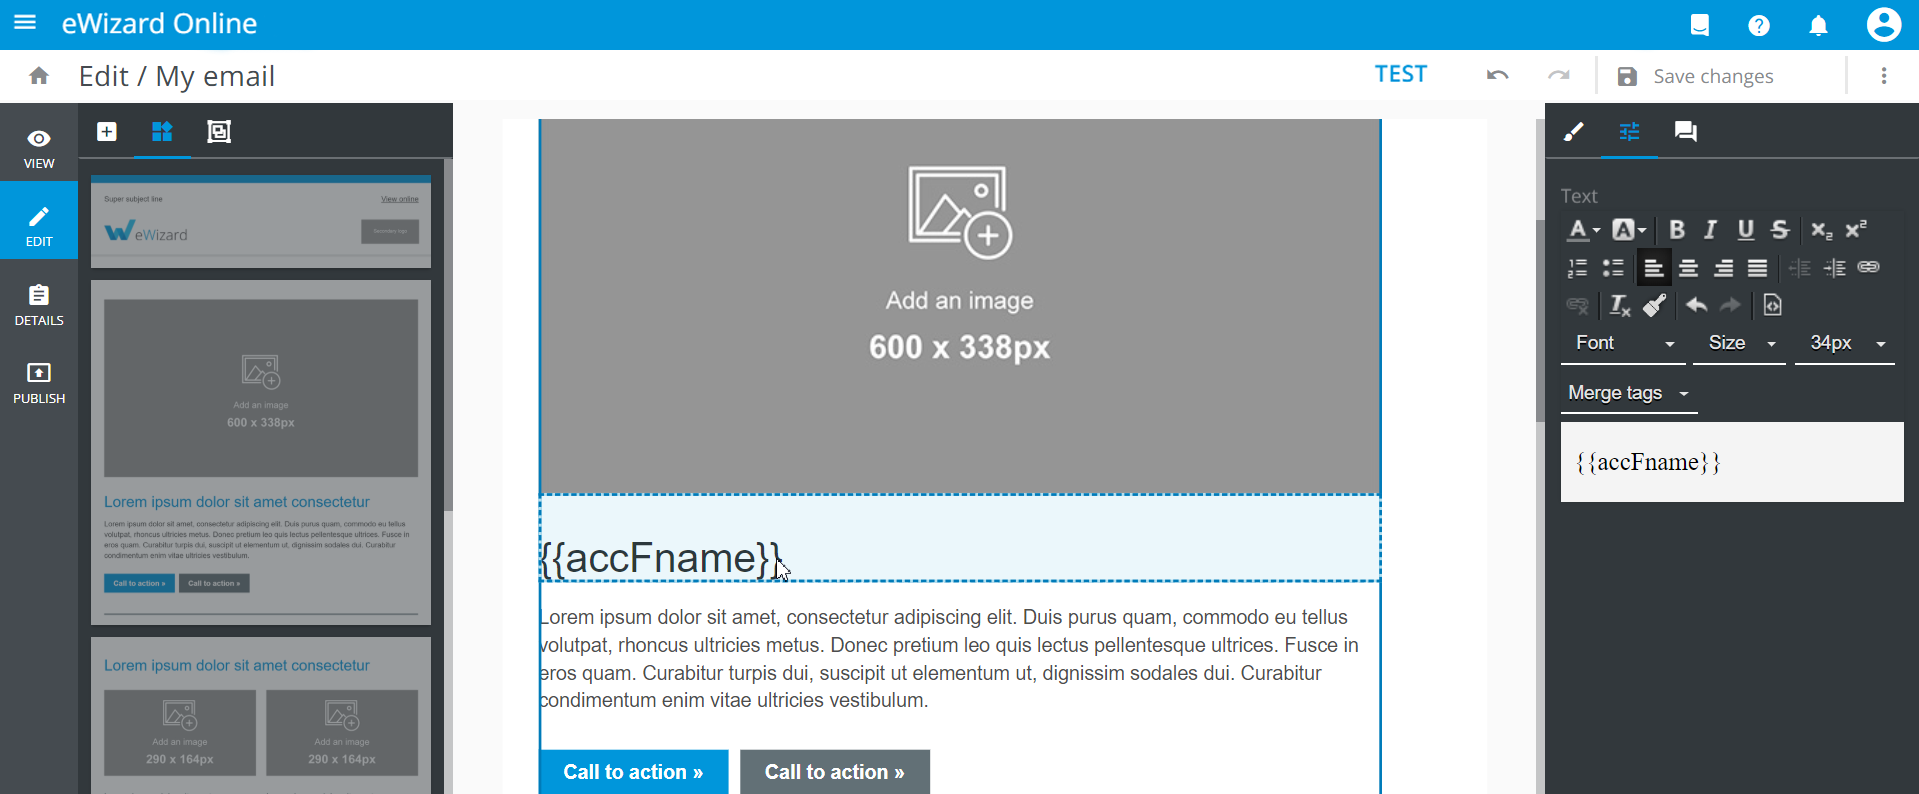
The Text component properties include the WYSIWYG text editor. To access it, add the Text component to the layout, select it on the layout, and go to the Properties tab. Then place the cursor in the text box. The text editor appears above the text field:
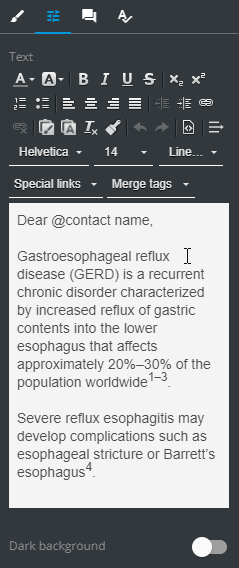
To activate the Dark background mode, toggle  to the right.
# WYSIWYG
| Control | Action | Control | Action |
|---|---|---|---|
 | Text color change |  | Add the link to the text |
 | Text background change |  | Remove the link in the text |
 | Bold the text |  | Paste the copied text, keeping the source formatting |
 | Italicize the text |  | Paste the copied text plain |
 | Underline the text |  | Remove formatting for the selected text |
 | Strikethrough the text |  | Copy formatting of the selected text |
 | Subscript the text |  | Undo the last operation |
 | Superscript the text |  | Redo the undone operation |
 | Make the list numbered |  | Access text HTML source |
 | Make the list bullet |  | Preserve the selected text from wrapping across the lines in the email client |
 | Align text left |  | Set the text font |
 | Center the text |  | Set the text font size |
 | Align text right |  | Set the line height for the text |
 | Justify the text |  | Set the link to the remote call for the selected text |
 | Decrease the text left indent |  | Add merge tags |
 | Increase the text left indent |  | Set the text preview background dark |
# Keyboard shortcuts
As an alternative to the cut, copy, and paste features, you can use the keyboard shortcuts for these actions:
Ctrl+X– to delete the textCtrl+C– to copy the textCtrl+V– to paste the formatted textCtrl+Shift+V– to paste the text onlyCtrl+Shift+C– to copy format
# Anchors and hyperlinks
You can add
First, create a destination anchor:
Select the required text on the layout.
Go to its
Properties.Click
 to open the
 Sourcepop-up.Wrap the destination text component in the
<span>tag and assign anidto it:
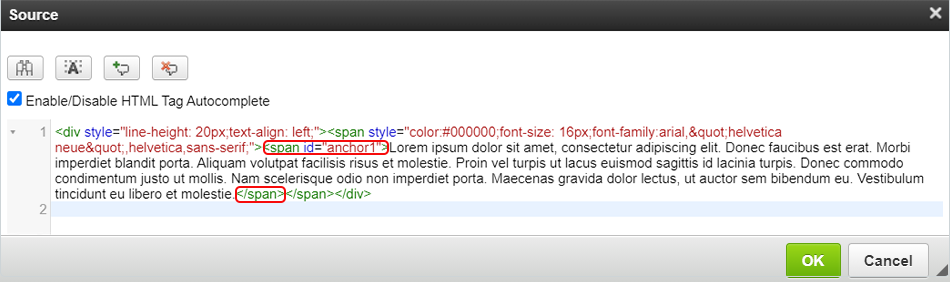
- Click
OKto apply the changes.
Then create a source anchor:
Select the required text on the layout.
Go to its
Properties.Open the
Sourcepop-up.Wrap the anchor text in the
<a>tag.Add the
idof the destination anchor to thehrefattribute starting with#:
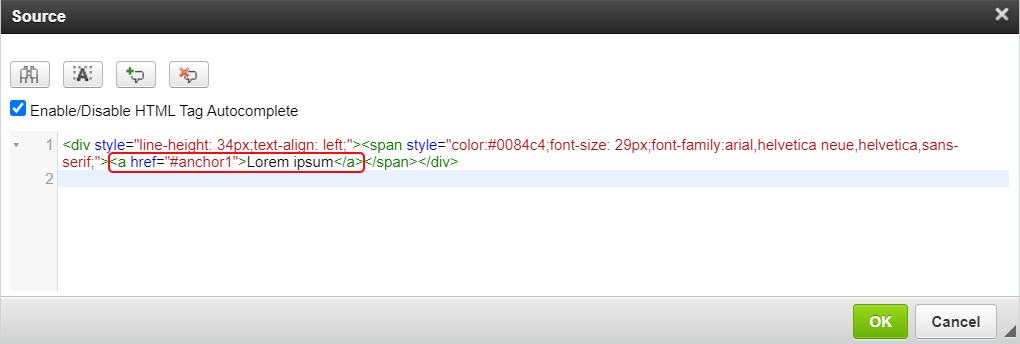
- Click
OKto apply the changes.
Check your hyperlink in Viewer.
# Links
You can link your text component with the external resources and services.
For this, do the following:
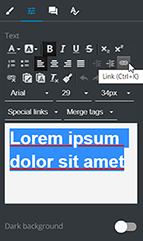
Select the required text on the layout.
Click the
Linkicon:
- Select the link type you want to use in the
Linkpop-up that appears:
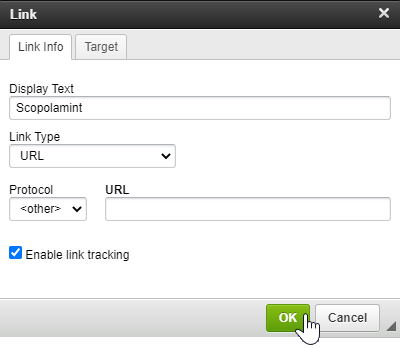
Consider the detailed information on link types in the table below:
| Link type | Result | Configuration and preparation |
|---|---|---|
| URL | Redirects to an external resource | Enter the target web address |
| Link to anchor in the text | Redirects to the particular part of your email | Preset the anchor before using this feature |
| Opens an outgoing email ready to be sent | Enter the subject, body, and/or the email address | |
| Phone | Starts a phone call | Specify the target phone number when setting this link type in eWizard Editor |
If you select the Enable link tracking checkbox, the tracking reports become available in your CRM system.
Click
OK.Save changes in the email.
# Merge tags
A merge tag contains unique user data inserted to the email that help you customize your email campaigns more efficiently when sending it. Herewith, tags are substituted by the addressee's relevant data such as their name, email, postal address, etc.
The list of merge tags available in eWizard Editor is determined by the target system selected on the email creation step. If you need other merge tags in the list, please contact your administrator.
# Merge tags dependencies
The available set of merge tags depends on the following prerequisites:
- Configuration made by the administrator.
Contact your administrator to receive the up-to-date list of merge tags that must be set up for each target system individually in your email service.
- Target system.
Merge tags ensure the correct behavior of the email in the target system that you specify when creating the email. The choice of the target system indicates the set of merge tags in your future email.
# Applying merge tags
To add a merge tag to the email, perform the following steps:
Go to the
Propertiestab on the tools panel.Click the text box to open the WYSIWYG editor.
Select the merge tags from the list or enter them manually:
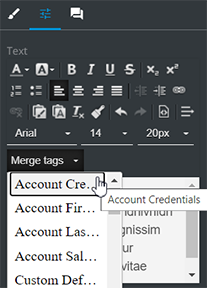
The merge tag is inserted in the text format on the layout and can be edited with WYSIWYG.
For proper operation: follow the correct syntax of the target system.
- Save changes.
When your email with merge tags is being sent, the target system substitutes them with the corresponding values.
Beware that when you publish the email to a different target system (not the one selected on the email creation step), the substitution of merge tags with their values can't be applied.
For emails targeted to Salesforce Marketing Cloud: you can enter manually any required parameter (product, language, country, or others) to the merge tag. As a result, the email link in the target system contains the values you added to the merge tag.